International Observe the Moon Night took place on September 19, 2026, with NASA inviting people to join public events or look from home. NASA's maps and viewing guidance also help beginners plan a session on another night.
NASA's 2026 Moon maps come in separate Northern and Southern Hemisphere versions. They show the appearance for that event date and label lunar landforms, the dark plains called maria and human landing sites. For another evening, use the Daily Moon Guide alongside the dated map so you can distinguish a permanent feature from changing illumination.
Choose the equipment you already have
NASA's Moon Viewing Tips distinguishes naked-eye, binocular and telescope viewing. You can begin without owning a telescope. The important choice is a target appropriate to the view you can actually get.
| Viewing method | What the view reveals |
|---|---|
| Unaided eyes | Notice the Moon's phase and the broad pattern of light and dark |
| Binoculars | Compare that broad pattern with the maria on your map |
| Telescope | Choose one landform and inspect its lighting and edge detail |
These are starting points, not guarantees that a particular feature will be clear from every location. NASA identifies the terminator, the boundary between lunar day and night, as especially rewarding for seeing landforms. Its position moves as the phase changes.
Make the first outing small
Check a sky guide for the Moon's position at the time you intend to go, then choose a place with a clear view in that direction. A roofline or a stand of trees can hide the target even when the sky above you is clear. Check the local cloud forecast before carrying equipment outside.
Read the map indoors first and choose one feature to find. Orient the map to your view rather than assuming that the top of a printed page will match the top of the image in every instrument. If using someone else's telescope at an organized event, ask how its view is oriented before trying to navigate the whole surface.
Once outside, look without taking a photograph immediately. Find the light-dark boundary, then the broad dark areas, and only then the smaller feature you selected. If you cannot identify it, choose an easier landmark and work outward. A labeled landing site marks a location; it does not promise that you can see equipment left there.
Why the same landscape looks different
The dark plains on a Moon map are geological features. NASA's Moon facts describes the maria as impact basins later filled with lava. Their outlines remain recognizable while shadows move across them. That makes the broad dark pattern a useful starting point when a smaller crater is difficult to identify.
Near the terminator, low sunlight casts longer shadows from ridges and crater walls. Toward full Moon, more of the visible face is illuminated, but surface relief can be harder to distinguish. A brighter disk and a more revealing view of terrain are different things. NASA's viewing guide recommends looking across different phases rather than treating full Moon as the automatic best night.
For binoculars, NASA suggests at least seven-power magnification and notes that ten- or fifteen-power instruments may need a tripod. More magnification also magnifies shaking. If the view keeps jumping, steadying the instrument can help more than trying to find a still smaller feature.
A telescope shows a narrower part of the Moon with more terrain detail. Its value for a beginner is seeing crater rims, mountains and valleys more distinctly. It also requires a steadier setup and familiarity with the instrument's view. An organized public event lets a newcomer compare that experience with binoculars before deciding whether to buy equipment.
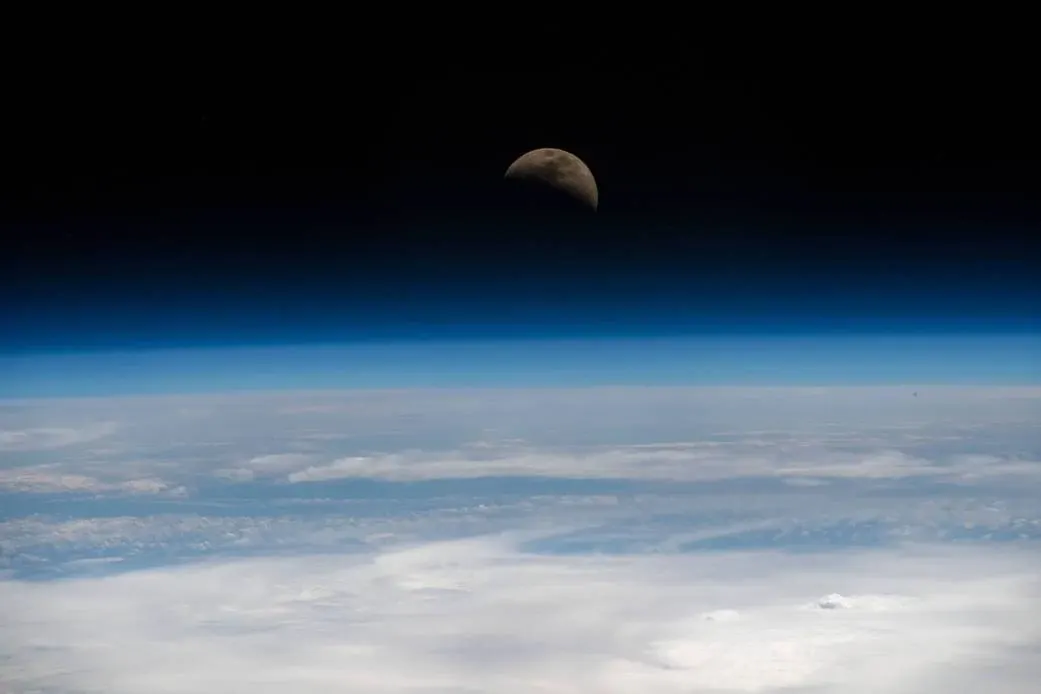
The photograph accompanying this article is NASA's April 2019 view of a quarter Moon above Earth's horizon, separate from the view available from the ground. A dated mission photograph and a map for September 19, 2026 have different purposes: one shows a particular scene, the other guides an evening's observing.
For another date, return to the Daily Moon Guide for illumination and position. Choose a location with a clear view and keep instruments pointed safely away from the Sun. At a hosted telescope, let the operator explain focusing and orientation before adjusting the controls.